Search This Blog

Monday 23 October 2017

Autumn Shrine by Chris Cresswell


Evening Crafters., Chris is back tonight with her final project this month.


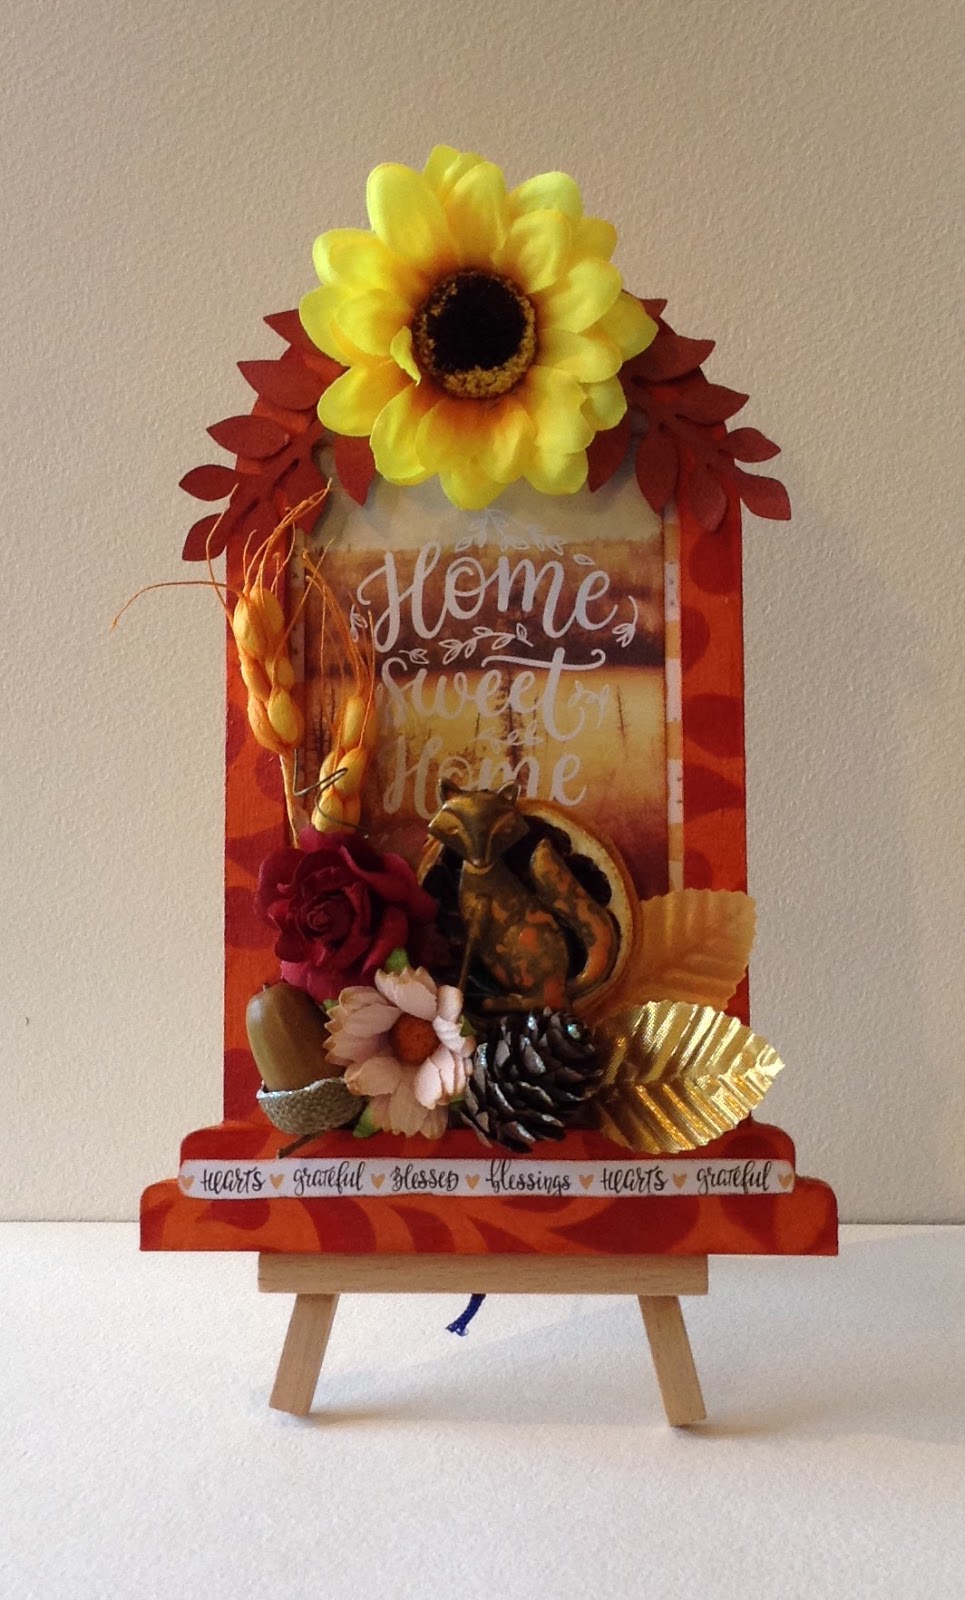
Hi everyone, Chris Cresswell here with my second project using the gorgeous products in this month's Goodie Box, 'Changing Seasons'. I do hope you like my 'Shrine to Autumn'! 


  • I used a Wendy Vecchi Studio 490 Artful Shrine, one of her 'art Parts' kits, to create my Autumn Shrine. This is what it looked like before I gessoed all over each part, back and front.
  • After a layer of gesso, I used several colours of PaperArtsy Fresco chalk paints, until I was happy with a fairly bright Autumnal orangey-red. I started with a layer of Haystack as this is an opaque chalk paint, followed by a layer of Pumpkin Soup, then Smoked Paprika, both translucents. 
  •  I then used the gorgeous leaf stencil over these layers using a mixture of London Bus and Tango. I was tempted to doodle around these leaves once they were dry, with a white gel pen, but resisted! 

  • The next step was to choose and cut to shape one of the gorgeous and brand new Prima Ambermoon 6" X 6" scrapbooking papers and insert it into the niche. On top of this I selected and glued down one of the Prima Abermoon notecards. The words would be the focal point. You can see some of the papers and notecards here:


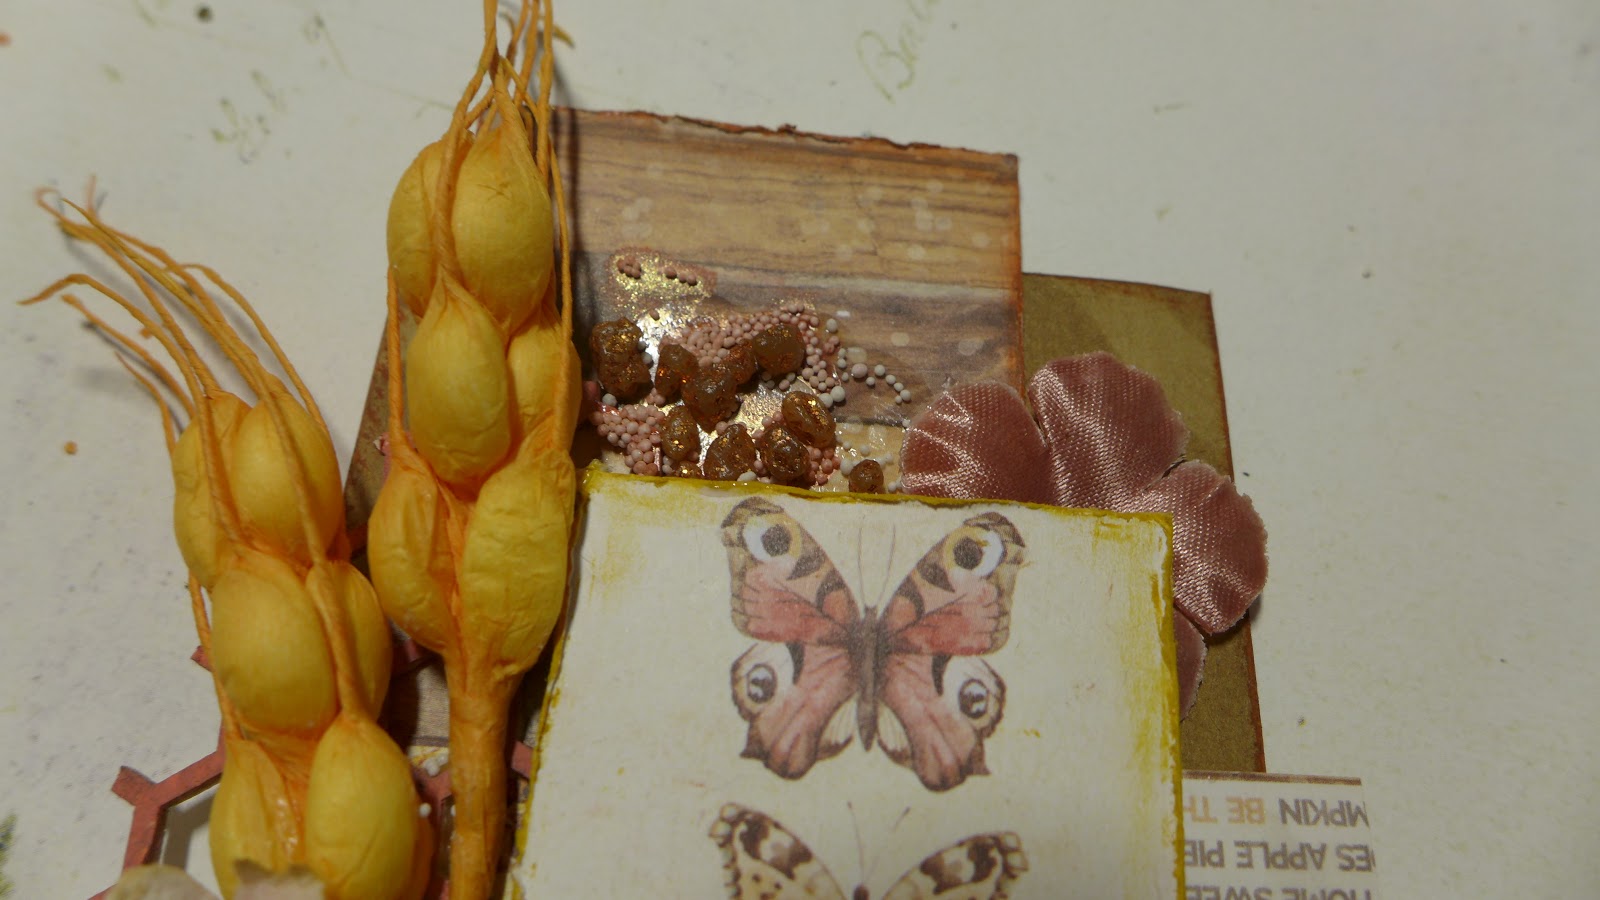
  • Now it was time to assemble some of the embellishments from the Goodie box, bringing them together in celebration of Autumn. I was able to raise some of the elements by strategically placing a couple of the orange slices in the lower left hand corner. These fruit slices smell delicious! I've added a mini fir-cone and acorn, collected for me by my grandchildren! I couldn't resist adding a bit of glitter! I've sprayed the metal bronze fox charm with 'Gilded' Prima Colour Bloom. I love these sprays. Those orange wheat stems have become a real favourite, adding balance to the whole assemblage.


  • The next step was to adorn the arch in some way. For this I glued down one of the yellow Daisy fabric flowers just below the centre of the arch. These flowers are huge and gorgeous. I had already used my larger resin leaves in my last project, so I used grunge paper and a Tim Holtz Bigz leaf die, cutting them down slightly and added these on either side of the flower, having coloured them first with some Distress Oxides: Fossilised Amber, Spiced Marmalade and Candied Apple. 


  • Finally, I cut a strip from one of the papers to add more words along the plinth, inking the edges first. And there you have it! It can stand alone, but I think I'll keep it on its little stand, bringing a little Autumn colour inside! 

Thanks Chris, this is super sweet, it would make a great mantelpiece focal point for the Autumn months.  


Be sure to take a look at Chris's blog. https/loopsandlines.blogspot.co.uk

Please leave 
a lovely comment to support our designers.

Thanks for looking

Jules xx


Sunday 22 October 2017

Autumn ATC's By Jules


Hello Crafter's


So its my turn on the blog tonight using Octobers' Goodie Box, Changing Seasons.
I have have made 3 ATC's, which I have never made before, but after spying some at a recent craft show, they made there way home with me, and now I have over 100 blank card lol:)


  • For my first one, I used the leaf stencil from the box with Prima Modelling Paste and covered with embossing enamels to melt.

  • Ink the edges with distress ink. I chopped up 3 pieces of Scrapiniec Honeyconb chipboard and painted orange.
  • Next chop up one of the Prima Ambermoon sheets of paper to use under the leaves.
  • I stuck all this down and used some of the leafs from the box to make a mini autumn wreath.
  • To finish I added some of our Orange Art Sand and Prima mini stones to create some texture, and used Prima Art Wax over the top for extra shine.
  • For the 2 card, I used a Lindy's spray through the leaf stencil and cut a topper and paper strip for the box. This was distressed and inked. With the topper I added some thick card to raise up.
  • Taking 2 of the resin leaves, I coloured with paint and wax. 
  • To finish, I added a piece of the honeycomb chipboard, Satin bow double tied and lots of thick gold glitter pieces

  • My last ATC is my favourite one, for this one I use the leaf stencil again with a blending tool and distress ink to create my background. This stencil is becoming a firm favourite. 


  • Again strip of paper and a topper were distressed and inked and raised again with thick card.


  • I used the last chipboard piece, 2 sprigs of wheat, 1 of the fabric flowers and a paper flowers to embellish.


  • I added our Glitzy Stones in bronze with some Prima Mini Art Stones, into the flower and around the card and finished with some more Lindy's spray.


I really hope you like my first try ATC's, I can see why people become addicted to creating and swapping them.

Thanks for looking and I hope you can leave a nice comment :) 

Jules xx


Saturday 21 October 2017

Give Thanks Card by Katie Lamb


Evening Crafter's 

Hope you are enjoying your weekend and are having some crafty time. 


Katie is back with her last project with the Changing Seasons Goodie Box 


  • Cover a 6 x 6 card blank with patterned paper and then add gesso randomly around the card
  • Spritz with red and orange ink and leave to dry


  • Stamp a texture stamp around the base of the card


  • Cut a piece of bandage  into strips and spritz with ink, once dry rough up the edges a bit and glue to edges of the card.
  • I used a die to create the photo strips which i added to the edge of the card.


  • Cut a leaf shape out of one of the toppers using a nesting die and then adhere to centre of the card
  • paint up a few of the resin leaves in rust red and orange before adhering them to the card


  • Finish off by adding a few large paper flowers.

Amazing to add die cuts filmstrips to this card, the white just sets off all the rich colours, great card, thanks Katie.

If you would like to see more of Katie's projects, please check out her blog https://whatkatiedid2.blogspot.co.uk/

We would love you to support our designers and leave a lovely comment.

Thanks 

Jules xx


Wednesday 18 October 2017

Autumn canvas by Chris Cresswell


Evening Crafter's

Chris is on the blog tonight with a fantastic Autumn canvas 


Hi everyone, Chris Cresswell here with my Autumn Canvas, using some of the scrummy products in this month's Goodie Box: Changing Seasons. 


 I chose to use a square 8" X 8" canvas, ready primed. I drew and painted a pumpkin shape to fill most of the surface but allowing for embellishments around the perimeter.


 I first sprayed the canvas, mainly around the edges and corners (including the sides), using Prima Colour Bloom sprays, choosing Autumnal colours. I added a beautiful, pink shimmery spray that was included in an earlier Goodie box! Once dry, I dabbed Distress Oxides through the fabulous leaf pattern stencil that's included this month. 


 Next, I chose some of the papers and tags to create a collage of images to fit the pumpkin. I love these tags! The burlap was perfect for the stumpy stem. I remembered to ink all the edges first! 


Now, it was just a case of choosing from the gorgeous selection of goodies to add embellishments and position them to create balance to the whole, overall image. I just adore those little resin leaves which I painted first before adding some acrylic glaze over the top. The little button pumpkin was a lucky find in my button box! I defined the perimeter with a Distress crayon: Rusty Hinge, blended in with my finger. 


 I wasn't happy to leave it at this point. I knew it needed something else. The sheaves of corn were perfect for added colour and defining the focal image. I also added some die-cut flourish leaves I had in my stash. Finally, using the little card that comes with each of the Goodie boxes, I cut out the title and the website name! And there you are. I love it! I hope it has persuaded you that you NEED to buy these Goodie boxes.  


Until next time...

This is how I put it together, but there are more photos and details on my blog if you're interested: https/loopsandlines.blogspot.co.uk

Oooh I love this can from Chris, so many elements and details to look at and clever idea to draw the pumpkin.

Please leave a lovely comment to support our designers .

Thanks for looking 

Jules xx 


Tuesday 17 October 2017

Fall Tag with Katie Lamb


 Evening Crafter's

Well this project is very apt today as the leaves where certainly falling and blowing all over the place!!


Our Team have been busy with the Changing Season Goodie Box an Katie is back tonight with a Fall Tag, She has added some Pine cone stamps and a Fall greeting.


  • Take a blank tag and cover with gesso
  • Once dry spritz with water and sprinkle over Yellow orchid Brusho Powder


  • Let the first layer dry and then apply clear modelling paste over the top using the leaf stencil
  • Next add Rose red brusho powder and use a paint brush to guide the ink into the centre of the tag
  • Next glue the two large silk leaves to the centre and add a few sprigs of wheat over the top.
  • Stamp out two pine cones onto card stock, cut them out and glue to tag

  • Add a large flower and words of your choice.

I love how rich this tag is and how the embellishments have been placed centrally, fab work from Katie.

If you would like to see more from Katie please check out her blog 

We would love you to leave a lovely comment to support our designers

Thanks for looking

Jules xx