Search This Blog

Sunday 27 November 2016

A Christmas card

Hello Crater's 

Well there's only 4 weeks to go to the big day, hope your planning is going well, hopefully the contents of your November goodie box has helped you make some festive items. 


                                                                                                                                                                                                                                                                                Here's a card from me, oh and a really rare photo, but I though it was time you saw the face behind the box so to speak lol xx


I love layers, but they can be hard to achieve, hopefully this step by step will help.


I started with one of the kraft card blanks for the box, and used some of the brown wrapping paper to die cut some leaves. Don't waste the packaging EVERYTHING can be reused, even the backing cards (we will have something on that in the future) 


I took one of the Echo park papers and stuck to the card as the first layer, then used Prima white Gesso over the top and around the card edges, 2nd layer. I also costed one of the large bronze snowflakes with 2 coats of gesso and this will be cut in half later.


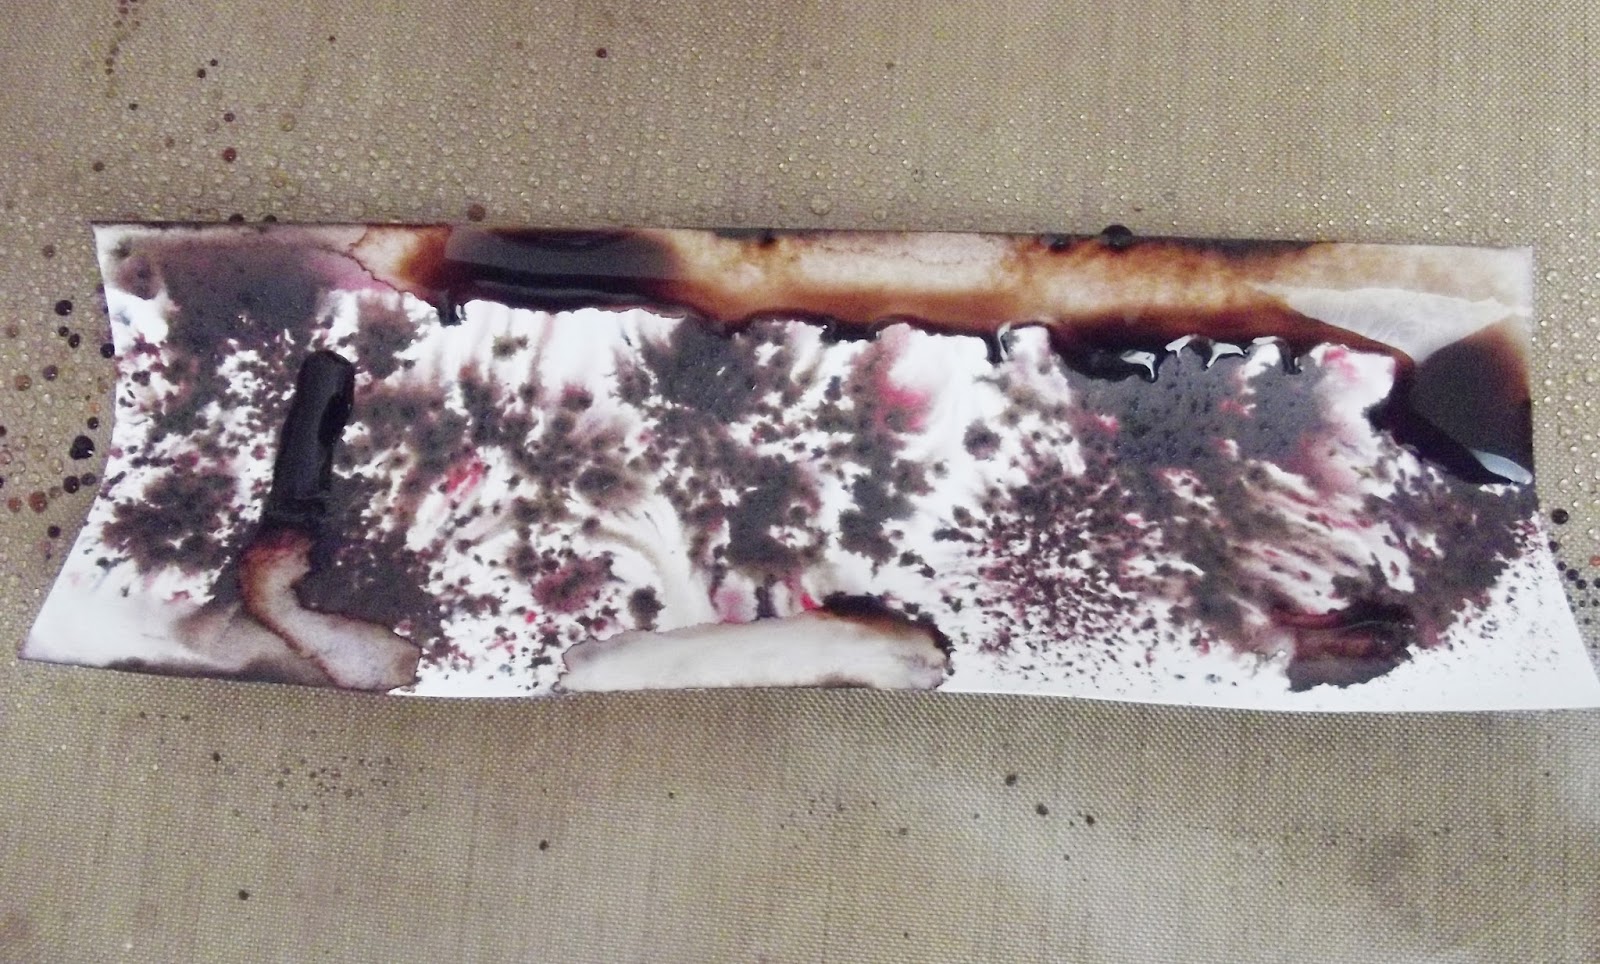
Next I ripped a sheet of the paper and rolled at the bottom tearing as I went, then inked and added an off cut of the 1st layer and as these paper are double sided, just turned over. I also linked around the edges3rd and 4th layer.


 I used some Prima modelling paste and a Dylusions snowflake stencil to add the 5th layer, as i used distress ink the paste will take on some colour and fade into the background more when dry.


I inked the leaves 


Another piece of the papers, distressed around the edges with scissors, painted with gesso and inked this will be the 6th layer


 Before I stuck that layer down I added the halves of the snowflake charm, some inked ripped pieces and some torn gold dollies, these were too bright so they were toned done again with gesso. This all added 3 more layers. I also splattered everything with red paint.


Next I worked on my focal points, using one of the Christmas tags, again distressed the edges and inked, I also added more gesso around the sides, after this phot I decided to add some ribbon attached with a stapler. The tree was inked, splattered with red paint and then more red ink over the top. I added one one the snowflake charms with some twine.

First I added a strip of ribbon at the side and then one of the poinsettia and cut of the white string. 

Then it is was a case of building up the floral arrangement. I included a generous amount of red sissal to the box, this stuff goes a long way and is a great way of adding more texture, you can paint it as well to change the colour. Its best stuck with a 3D gel, but glue works as well you just need to keep it held down for a while. 

I painted a couple of berries and coated the flowers with yep you guessed it white gesso :) 


The last layers were to add the tag and tree, the reindeer ribbon slider and 2 of the sparkle gems. 


I love rustic looking Christmas cards, and I hope you like it too.

Thanks for looking, would love you to leave a comment

The December box was released yesterday and it available to pre-order now, I have discounted the cost and added extra items to get into the spirit of the festive and sale season.


Jules xx

Sunday 20 November 2016

Christmas Crackle Reindeer card by Guest designer Katie Lamb

Hello Crafter's 

Whilst I am typing this it's very white outside, really gets you in the mood for a bit of Christmas crafting, and luckily we have just the blog for you lol x

Tonight we have the very talented Katie on the blog to show us her fab make with the November Box " It's Christmas Boxed up"


Hello Katie here, I started crafting about 12 years ago as I needed somewhere to store my photos and wanted to include a bit more about them so started scrapbooking. I got into mixed media about 3 years ago after seeing it in a magazine and have been hooked on paints & inks ever since then. 


Christmas Crackle Reindeer card


Take a 6 x 6 sheet of paper and tear around the edges. Don't worry about being neat as this adds texture. Adhere this onto one of the embossed card blanks.


Cut a silver doily in half and adhere to card. Next take one of the 6 x 6 papers and cut a 6 x 2 strip and adhere it over the doily before trimming to fit.
Cut a 3 x 5 rectangle and adhere over the strip


Take the other half of the doily and place it over the larger rectangle.
Cut another smaller rectangle and place this over the larger one.


Take one of the torn sides from the first layer and place over the top of the small rectangle.
Cut a strip 2 x 4 and place across the center of the card.
Paint the wooden reindeer. I used black gesso for the first layer and then added crackle paste to it which i tinted with gold paint.


Decorate the card by clustering the 
poinsettia and berries around the card. Finish off by adding a sentiment topper.


Thanks Katie, I love the cracked reindeer and the composition of this card, beautiful.

Katie's blog is http://whatkatiedid2.blogspot.co.uk/

If you are interested in the November goodie box, we still have a couple left, just click the link below to go to the page.


Thanks for looking and please leave a nice comment. 

Jules xx


Saturday 5 November 2016

Using Bistre powder

Hello

So I promised I would show you how to use the Bistre powder which came with the October goodie box.

It came in a glass jar, and the best way to start is to pierce the top of the lid. (sharp poky tool works well). This way you can shake it on to your projects in small amounts.

I started with a very small amount on white card. A little goes a very long way.


Then spray water over the top, this really highlights the different colours within the powder, and could be left to dry like this


But I moved it back and forth


And how it dried


Nice, I like this for a larger piece of card, Great for mat & layering or die cutting

I Started again on small pieces of card, this one is with less water 


Then moving the card and drying with a heat gun at the same time.


 Spray the card with water first, lots of it and then sprinkle the Bistre, another different look. 


Next I tired to colour with 3D gel and texture paste, use a small amount of powder and mix well


Again different results, the 3D gel goes much darker than the paste.


The last one was mopping up the watery mess on my craft mat with plain copy paper, this takes the colour well and can be used for backgrounds and stops any waste.


I hope this was helpful, would love to see how you use yours!


The November goodie box is available to pre-order now, please go to http://www.artfuldays.co.uk/ourshop/prod_5450620-November-goodie-box-Its-Christmas-all-boxed-up.html 


Thanks for looking, would love it it you could leave a nice comment 

Jules xx