Search This Blog

Monday 25 July 2016

Family Canvas by Linda DT Member

Hello Happy Monday 

We have our last post from Linda for the July box - Boooo!!
The box will be on sale until the sell out, so if you would like one please click here to go to the website 


Family Canvas 


I gave the canvas a coat of Gesso then using the Tim Holtz tissue paper added strips with PVA Glue.


Using a baby wipe I colour washed with Distress paint antique linen to give a vintage look.


I then tore sheets of music and some of the Prima Vintage Emporium notelets and distressed with Distress Ink aged mahogany.  The ribbon I folded into the middle on each side and adhered to the canvas, I then distressed around the frame with aged mahogany distress pen.


The wooden tree and family where given a coat of Adirondak paint in mushroom then adhered to canvas.


The Tim Holtz Found Relatives card has been cut down, distressed around edges with my scissors then matted and layered onto vintage emporium card which has also been distressed. I then added the metal charm under the image and added button along the bottom onto the ribbon.


To finish off the canvas I added paper and metal flowers to the tree, made a flower with the lace and added the metal flower to the centre.

Linda's Blogs - http://lindasimpsoncraftypieceofheaven.blogspot.com
http://lindasimpsoncraftypeiceofheaven.wordpress.com

Oh Linda this is super cute, I love how you have decorated the tree and the shabby chic
 feel :)

Thanks for looking and I hope you can leave a nice comment

Jules xx


Saturday 23 July 2016

Alerted red frame by Linda, DT member

Hello, I hope you are having a fab weekend, I am on a little weekend break with my 2 lovely dogs, oh and the OH lol :) 

Linda is to show you how to make the most amazing little frame, using some of the packaging from the box. 


Alerted red frame


Using the red tissue paper that the contents were wrapped in, I tore into little pieces and decoupaged them onto the frame with PVA Glue


The next step was to add the musical paper to the inside but first distressing with Distress Ink aged mahogany.


This snapshot shows how I dry brushed Distress Ink antique linen over the tissue paper, the effect look beautiful.


The next step was to decorate the inside of the frame with the flowers, charms and pearl gem. The label is from one of the Prima Vintage Emporium notecards


 To finish off I added the applique butterfly, 4 red pearl gems and the word "Love" is cut out again from one of the Prima Vintage Emporium notecards.


Wow Linda I love this piece and how you have used the red tissue paper from the packaging to create a stunning effect with the frame and the centre floral piece is gorgeous

Thanks for looking and I hope yo can leave a nice comment

Jules xx 


Thursday 21 July 2016

3 creations from Chris DT Member

Hello, hope your all well, just one more day to go to the weekend woohoo:) 

Tonight Chris is back with 3 stunning projects from the July Box, all the information on the box is on the website please click here for details. 


Hi everyone,
Chris here again to show you another three of the projects I was able to make with the delicious contents of the July Goodie box. And I have still have so much left! 
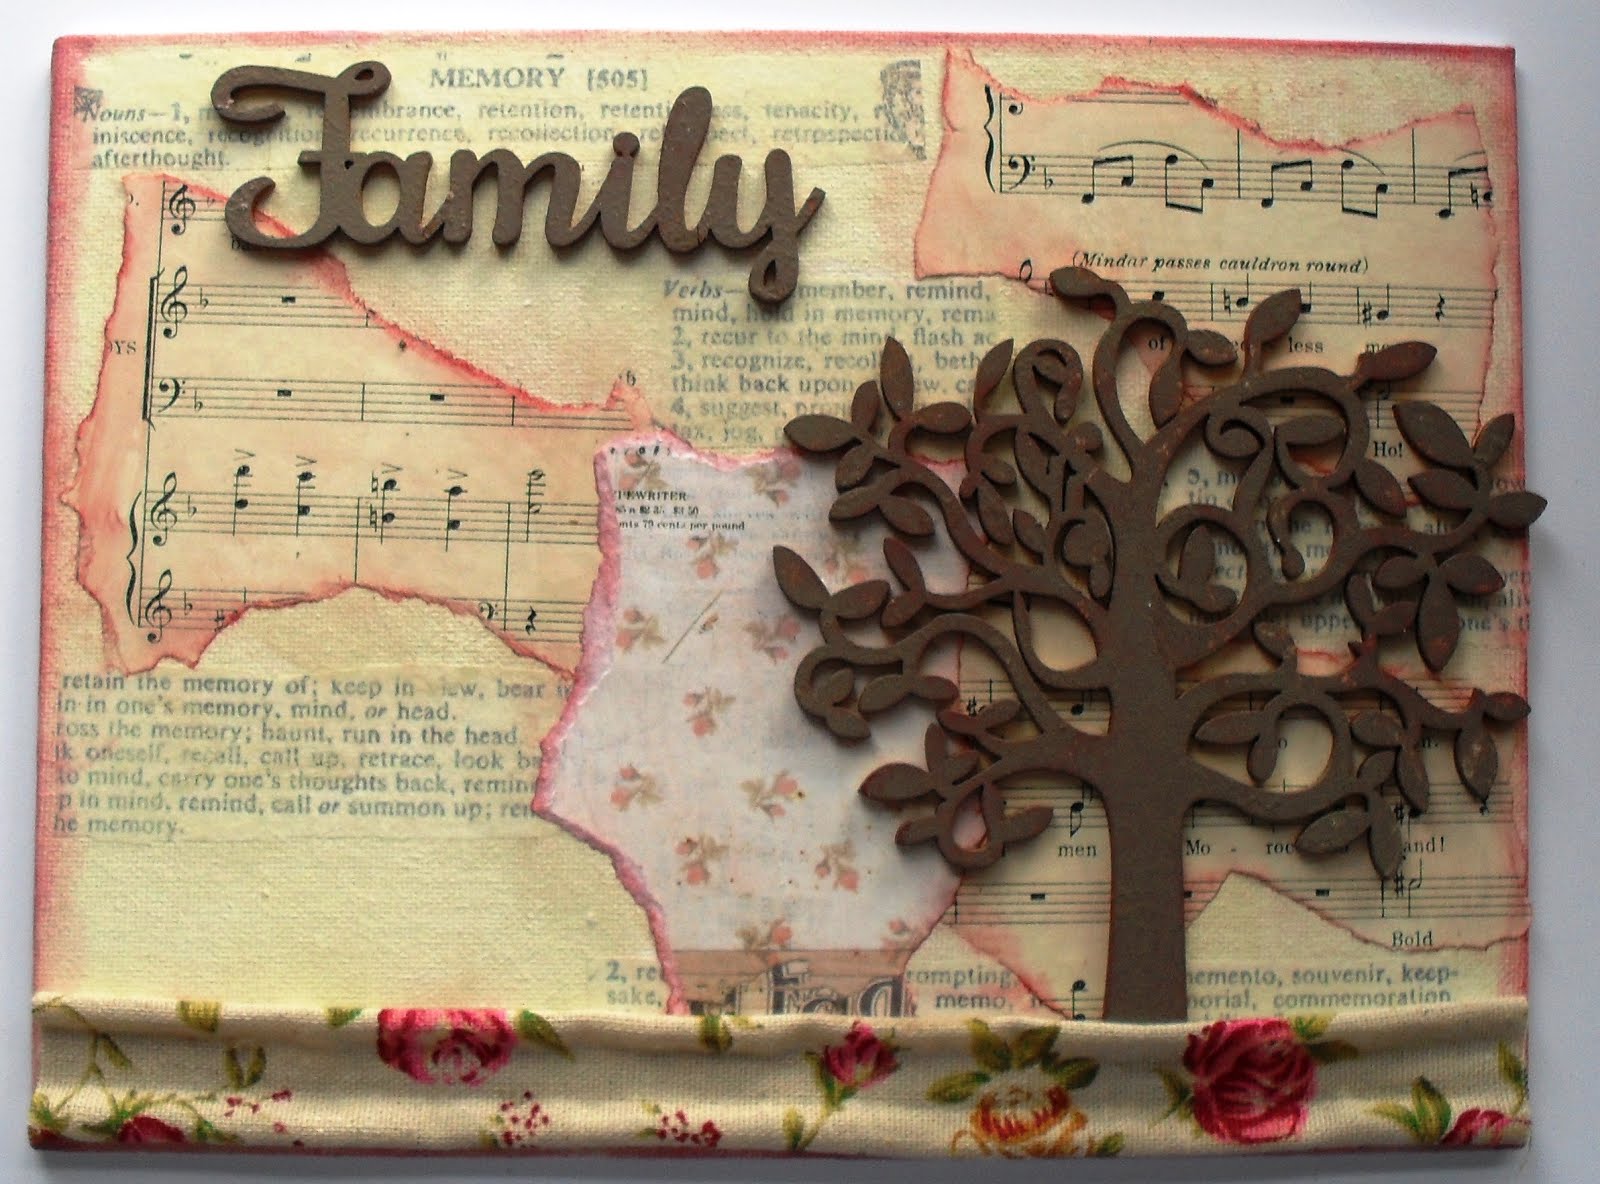
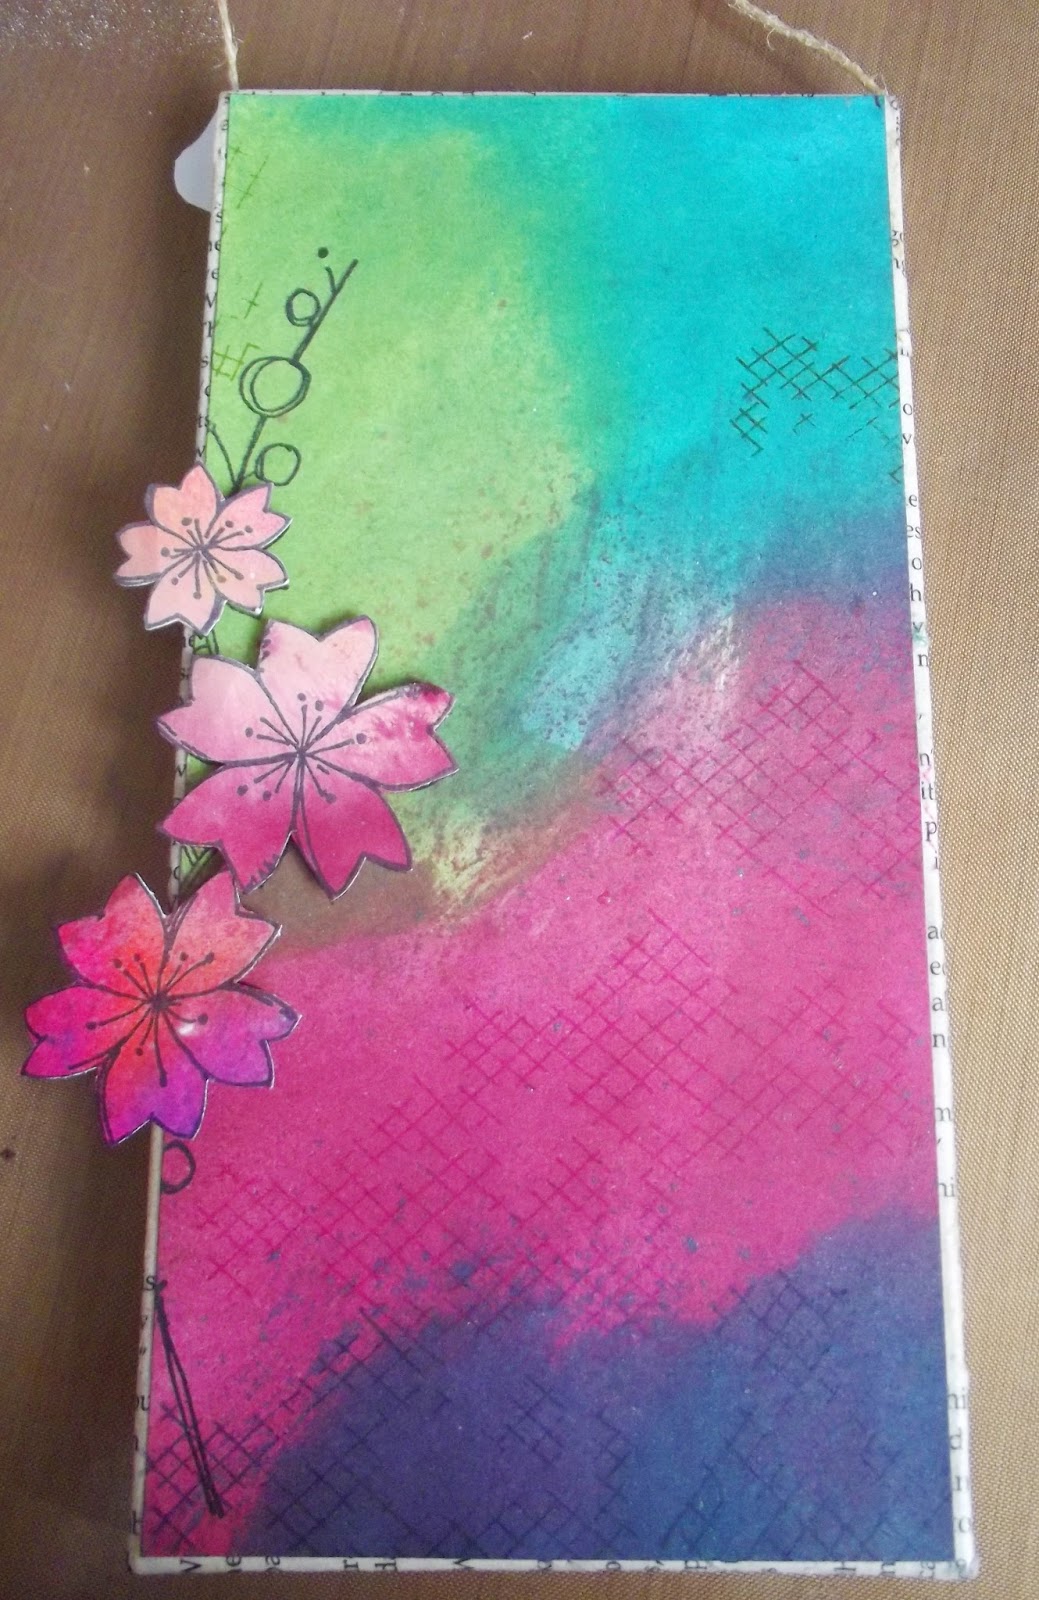
First up is a mini wall hanging that could also be used to decorate a box lid or a journal cover. I'm possibly going to adhere it to the front of a family photo album I'm making for my husband but shhhh he doesn't know about it yet! 

Mini Tag 


Using a small Tando tag for a surface, after first gessoing the surface, I coloured it completely with the Aged Mahogany Distress pen. Those pens brush the ink on so easily and smoothly.  I then ripped some of the vintage dictionary paper included in the box (you get several sheets) to almost cover the surface; then distressed, rolled and inked the edges, all the way round. I love this technique of ageing paper. 

On top, I adhered a piece of the rose print fabric (what a find!!! I love this) centrally to allow some of the distressed dictionary text to show at the top and bottom. I then added some of the vintage lace either side of this. You get some wonderful metal embellishments included in the box. 

I used the large circle with edged hearts to frame one of the 'Found Relatives' photo (Tim Holtz) which I had die cut to fit the frame. Each box has a lovely selection of these photo cards. Now it was just a matter of adding embellishments to complete the vintage 'feel' to the project. I cut one of the embroidered butterflies in half (you get two of these in a pack) to place behind the metal frame. I used some of the frayed edging from the rose print fabric to wrap around one of the darling little cotton reels you get in the box. Isn't it so sweet? You get four of those. Two are slightly larger. Another clever 'find' of Julie's. Then it was just a case of adding some of the buttons, gems and flowers to add interest. You get a huge amount of buttons! I even used one attached to the string for hanging it up. By the way, that string was part of the packaging which I coloured with the Distress pen! 
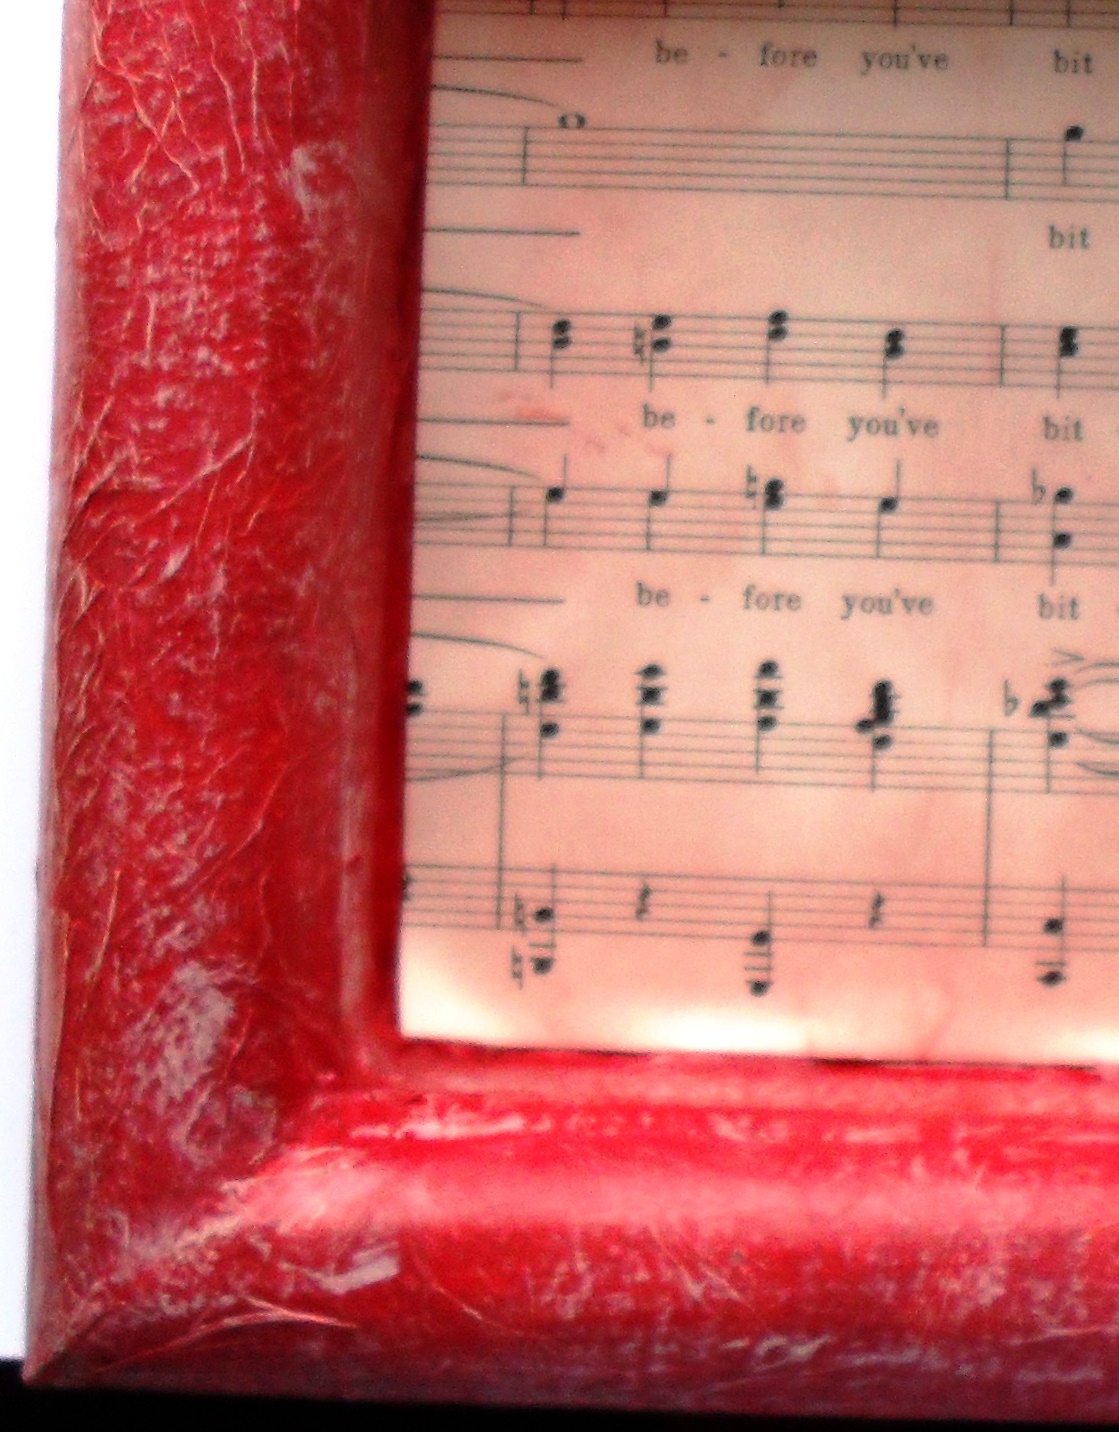
Vintage Card


Here you can see more of that coloured string wrapped around this mini greetings card. I've made this for a friend's 35th wedding anniversary! This 'Vintage' theme has been very useful and relevant for me! 

The contents are really wonderful for any wedding, christening, engagement occasions you have lined up. Sadly, quite relevant too for the hardest to make cards of all: funeral cards. Of course, if you can waIt that long, this box would be great for Valentine's day! This time I used some of the vintage music sheets included in the box. Distressing and colouring the edges as before. 

The only item I've added here us the 4" x 4" Kraft card. Even the letters have been cut from one of the several, adorable Prima cards in the box. 

Butterfly Card


And finally, at least for now, is a birthday card I've made for a friend. Included in this wonderful box, are two huge die cut butterflies (in the freebie bag). They are beautifully embossed! This is one of only two times I added a mini Ranger Distress ink in Vintage Photo with the Distress pen included in the box. This is because I wanted to vary the depth of colour on the butterfly. 

The background was created using the latticework stencil by Tim Holtz and using a foam pad to lift ink from the brush pen that had first been scribbled on the craft mat. I could have just used my own distress ink pad in the same colour but I wanted to experiment with the pen and see just what effects I could achieve. And, I like it! This was stencilled on top of a gessoed background where I had also added strips of the dictionary paper for added texture. 

To complete the butterfly, I needed to just add another of the gorgeous metal embellishments and some of those pretty pink rose gems included in the box to complete its body. Then, by adding a couple of the paper flowers (after tingling the edges with the Distress pen) with another little gem, and creating a border with the fine nib of the pen, the card was finished! 


I hope you like these examples of just a few items you can make with the contents. I will be making more as I delve deeper into this wonderful Goodie box. Until next time! 


I have to say I love all these designs and way Chris has used the bronze embellishment with the pearls to create the body of the butterfly, very inspiring.

Thanks for looking and I hope you can leave a nice comment. 

Jules xx

Tuesday 19 July 2016

"Together" from Chris DT Member

Hello phew its been a hot one today, hope you have all been keeping cool :) 

Tonight on the blog we have Chris with some more inspiration on how to use some on the products in the July goodie box, if you would like to buy one click to link here 


Hi everyone. Chris here, to show you my first project made with some of the delicious contents of July's Goodie box. There is so much to choose from! I used one of the two 6" x 6" grey board surfaces to create a vintage-feel layout, featuring one of the Tim Holtz 'Found Relatives' photo cards you get in this month's box of goodies. 


Having gessoed the grey board first, and using matte medium, I glued down some ripped fragments torn from the sheet of tissue, dictionary papers and packaging to create a textured background.


When it was dry, I gessoed over it again with a fairly watery white gesso. 


Then, using the Distress pen marker in Aged Mahogany, I scribbled some colour firmly onto a craft sheet (using the brush end) and then added some water to make quite a watery puddle of ink. I dipped a thin, round brush into this and splattered the puddled ink across the gessoed background. This Aged Mahogany is a gorgeous colour! 


By cutting, tearing and die-cutting some of the papers, cards and fabric inside the box, I created a pleasing layout on top of the background. I made sure to ink all the edges with the brush tip of the distress marker before I glued everything down with matte medium again. I cut down the photo card to fit inside the aperture I'd created, then rounded off the corners.


All I needed to complete the layout was to select and add some of the gorgeous embellishments from the goodie box ( and there are lots to choose from) and one of the die-cut words. And voila! 

I do hope you like it. I'll be posting three more projects that I was inspired to make from the July Goodie box on Thursday evening. Same time. I do hope you can join me here, Chris :)


Thanks Chis, a fantastic post. I love die cut circle and the way you have used the distress marker. 

Thanks for looking and I hope you can leave a nice comment 

Jules xx


Saturday 16 July 2016

8x8 card from Linda. DT


Hello, hope you are having a great weekend.

We have another fab post from Linda, this time she has designed a fab 8x8 card for us, this is my personal favourite size card, using some of the contents of the July craft box, for details please click here


8x8 card from Linda 


 Onto an 8 x 8 white square scalloped edge card I matted and layered Kraft card.  Taking 2 of the Prima Vintage Emporium notecards I cut into 2 pieces each measure 7 x 8.5 cm, distressed the edges with Tim Hotlz distress pen aged mahogany.


I then took a piece of the dictionary paper and tore around then distressed with aged mahogany.


Using string from the packaging I wrapped around and then adhered to base card.  I trimmed down the Tim Holtz Found Relative card and matted and layered onto Kraft card.  I added the metal charm which reads "live your dream"
To finish off I added buttons to two corners, 4 blue pearl gems and die cut word friends.


I am sure you will agree this is a fantastic card and she has used just a small amount of materials to make it. 

Linda's blog is -  http://lindasimpsoncraftypieceofheaven.blogspot.co.uk/
You Tube Channel - https://www.youtube.com/user/malta1960

Thanks for looking and I hope you can leave a nice comment

Jules xx


Friday 15 July 2016

PaperArtsy #3UP - JOFY with Inks

Hello all 

I was really pleased to be chosen to be part of the PaperArtsy #3UP challenge. my stamps are from the  JOFY range.
Jo Firth-Young is the designer and I love her style, the stamps all integrate together
so well and are so versatile.

Please visit the shop and access the blog here  they have amazing rubber stamps and their own range of Chalk based acrylic paints. 

These are the stamp designs I was given to use.


I wanted to make a wall hanging, so choose a Papermache surface.


Using matt medium I covered the surface with book text front and back.


Then I used Lindy's stamp gang sprays over some white cardstock, I sprayed and then rubbed in with a baby wipe to blend the colours


Next I went a bit crazy with spraying Dylusions and Lindy's sprays. so I had to use a white spray over the top to calm it down. I was left with a lovely shimmer. Then stamped one of the floral images, I cut around flowers and set to one side. 


Next I stuck the sprayed sheet on the top of the wall hanging and then stamped the same image.


I added the flowers and some back ground stamps, lightly with a range of ink colours from Archival 


Then I started on the leaves, Stamping in green ink and then I water coloured them with distress inks 


Now for some heat embossing using a gold wow powder and a fantastic word stamp from Jo


I got carried away at this point and forgot to take any more step by step photos lol :) So I repeated stamping and colouring images with sprays and build up a 3D image using the wall stamp (love this one) I also gold embossed some little bee images. 

To finish I used some Classic Treasure Gold, to dust around the sides. I wanted to try and get a good colourful project in 3D and with a bit of a vintage feel and I am very happy with the result.

So here's the finished piece.


I really hope you have enjoyed the process, check out the rest of the blog here

Thanks 

Jules xx


Thursday 14 July 2016

PaperArtsy #3UP - JOFY with Inks

Hello 

I was really pleased to be chosen to be part of the PaperArtsy #3UP challenge. my stamps are from the  JOFY range.
Jo Firth-Young is the designer and I love her style, the stamps all integrate together
so well and are so versatile.

Please visit the shop and access the blog here  they have amazing rubber stamps and their own range of Chalk based acrylic paints. 

These are the stamp designs I was given to use.


I wanted to make a wall hanging, so choose a Papermache surface.


Using matt medium I covered the surface with book text front and back.


Then I used Lindy's stamp gang sprays over some white cardstock, I sprayed and then rubbed in with a baby wipe to blend the colours


Next I went a bit crazy with spraying Dylusions and Lindy's sprays. so I had to use a white spray over the top to calm it down. I was left with a lovely shimmer. Then stamped one of the floral images, I cut around flowers and set to one side. 


Next I stuck the sprayed sheet on the top of the wall hanging and then stamped the same image.


I added the flowers and some back ground stamps, lightly with a range of ink colours from Archival 


Then I started on the leaves, Stamping in green ink and then I water coloured them with distress inks 


Now for some heat embossing using a gold wow powder and a fantastic word stamp from Jo


I got carried away at this point and forgot to take any more step by step photos lol :) So I repeated stamping and colouring images with sprays and build up a 3D image using the wall stamp (love this one) I also gold embossed some little bee images. 

To finish I used some Classic Treasure Gold, to dust around the sides. I wanted to try and get a good colourful project in 3D and with a bit of a vintage feel and I am very happy with the result.

So here's the finished piece.


I really hope you have enjoyed the process, check out the rest of the blog here

Thanks 

Jules xx